5-Minute Home Hack to Make Any Room Feel Bigger

Home Hack Overview

A Home Hack changes how a room feels without tools, purchases, or renovations. This 5-minute home hack focuses on visual alignment and light flow to make any room feel bigger.

Space perception matters across the GTA. Condos shrink. Townhomes tighten. Detached homes still suffer from poor layout cues. This Home Hack solves a common issue fast.

Watch our video above for step-by-step instructions and a live walkthrough of the process.

LifestyleVideos.com shares practical home and lifestyle guidance designed for real homes and real schedules.

Why This Home Hack Matters

Buyers and homeowners react to space first. Square footage numbers follow later.

This Home Hack improves perceived room size. It improves flow. It reduces visual friction.

Key benefits include better listing photos, calmer daily use, and fewer layout objections during showings.

Research from the National Association of Realtors shows buyers rely on visual cues when judging room size and livability. Lighting, sightlines, and furniture placement influence perception more than room dimensions.

This approach fits renters, owners, sellers, and investors. No permanent changes. No approval needed.

GTA Living Insight: Why Rooms Feel Smaller

Homes across the GTA share a common issue. Rooms collect visual noise.

Condos face limited wall depth. Townhomes stack furniture along traffic paths. Older detached homes mix light sources and block windows.

Buyers move fast through listings. They scan photos. They judge space within seconds.

This Home Hack targets three triggers buyers use.

Sightlines. Clear views from entry points increase perceived depth.

Light flow. Balanced lighting expands visual boundaries.

Edge control. Clean edges define usable space.

These principles apply across Toronto, Etobicoke, North York, Mississauga, and Vaughan.

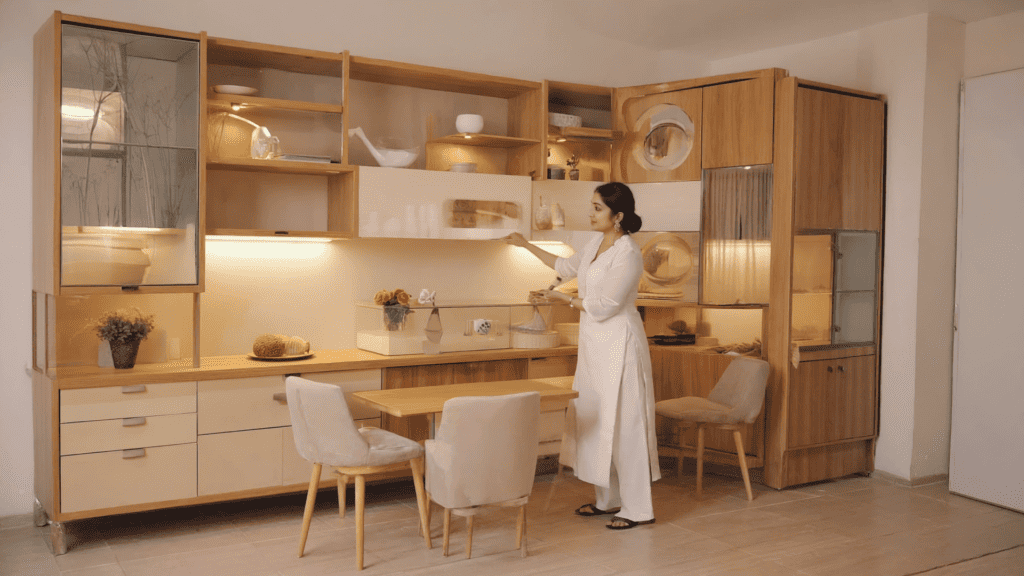
How to Do the 5-Minute Home Hack

This Home Hack follows one rule. Create a clear visual path from entry to the far wall.

Step 1: Pull furniture off the walls

Move the largest furniture piece two to three inches forward. Floating furniture defines space and creates depth.

Step 2: Clear the floor edges

Remove small items along baseboards. Baskets, stools, and bins shrink rooms.

Step 3: Align the focal line

Face seating toward the longest wall or window. Straight lines extend sightlines.

Step 4: Balance light sources

Turn on two light sources at opposite sides of the room. Balanced light removes dark corners.

Step 5: Edit surfaces

Clear coffee tables and side tables. One item per surface holds attention without crowding.

Step back to the doorway. Adjust angles. The room reads larger within minutes.

Common Errors That Shrink Rooms

Pushing furniture flush to walls.

Blocking windows with tall items.

Using one overhead light source.

Overfilling shelves and tables.

Each issue compresses visual space and weakens this Home Hack.

How This Helps Listings and Daily Living

For sellers, this Home Hack improves photo depth and room flow.

For owners, it improves comfort and movement.

For renters, it improves function without lease changes.

LifestyleVideos.com features short-form videos and guides designed to support these outcomes.

People Also Ask

Does furniture placement affect room size perception?

Yes. Placement influences depth, flow, and usable space cues.

Does this work in small condos?

Yes. Condos benefit the most from clear sightlines and balanced light.

How often should this reset happen?

Before photos, showings, gatherings, and seasonal resets.

Final Tips Before You Reset a Room

Repeat this Home Hack in living rooms, bedrooms, and home offices.

Pair it with neutral lighting and clean floor paths.

Watch the embedded video above for a full visual walkthrough.

LifestyleVideos.com shares practical guidance for smarter living across the GTA.

Related Articles

β€’ 5-Minute Curb Appeal Home Hack

5-Minute Home Hack to Make Any Room Feel Bigger
Home Hack: The 5-Minute Backyard First Look

Home Hack: The 5-Minute Backyard First Look

Home Hack: The Backyard First Look This home hack gets your outdoor space spring-ready without a full weekend of yard work. Watch our video above for step-by-step instructions. Your backyard survived winter. You have not looked at it since November. That changes today. The Backyard First Look is not a full cleanup. It is not a landscaping project. It is five minutes, one bag, and one clear-eyed pass around your outdoor space β€” enough to see what you have and feel ready to use it again. LifestyleVideos.com built this hack for GTA homeowners who want to get outside faster, not plan longer. Why the First Look Matters Spring does not start when the calendar says so. It starts when you step outside and feel like the space belongs to you again. After five months of snow, salt, and frozen ground, most backyards in the GTA are covered in a layer of winter residue β€” dead leaves, forgotten pots, debris that blew in from the street. None of it is damage. All of it reads as abandonment. That visual layer is the problem. Your brain processes an uncleared outdoor space the same way it processes a cluttered room. It reads as incomplete. It registers as a project. And projects get avoided. According to research from the American Psychological Association, time spent in outdoor green spaces measurably reduces stress and improves mood β€” but only when those spaces feel accessible. A backyard buried in winter debris does not feel accessible. The first look removes that barrier. You are not finishing the yard today. You are starting it. And starting is the part most people skip. What Five Minutes Actually Gets You This is not a promise. It is a sequence. When you clear the visible surface layer from a patio or backyard, the space shifts from dormant to active in your mind. You stop filing it away as a task and start thinking about how to use it. That shift matters in the GTA, where outdoor season runs roughly May through October. Six months. Every week you delay the first look is a week of outdoor living you do not get back. A cleared patio also changes how your home reads from the inside. Looking out at a clean deck changes your relationship with the space before you even step onto it. The Method: One Bag, One Pass You are not reorganizing. You are clearing. Step 1: Grab one bag. A yard waste bag or a contractor bag. One is enough. You are not doing a full cleanout β€” you are pulling the surface layer. Step 2: Walk the perimeter. Start at one corner and move around the edges of your yard or patio. Pull dead leaves, broken pots, anything that did not survive winter. Drop it in the bag. Keep moving. Do not stop to assess or plan. Step 3: Sweep your deck or patio. One pass with a broom. Push debris toward one corner, then bag it. You are not power washing. You are not scrubbing. One sweep. Step 4: Step back and look. Stand at the door or back of the yard and look at the space. That is your outdoor area. It was there all winter. Now you can see it again. For your next outdoor reset steps, LifestyleVideos.com has a full series of seasonal home hacks organized by space and time investment. People Also Ask How do I prepare my backyard for spring in the GTA? Start with a surface clear β€” dead leaves, forgotten containers, winter debris. Then sweep your deck or patio. These two steps take under ten minutes and make the space feel usable again before you do any planting or furniture setup. When should I start spring backyard cleanup in Ontario? Once daytime temperatures stay consistently above 5Β°C, your outdoor space is ready for a first pass. In the GTA, that window typically opens in late March to mid-April. Do I need to do a full yard cleanup before using my patio? No. Clear the surface, sweep the patio, and use the space. A full cleanup can follow in stages over the coming weeks. One Bag Is All It Takes You do not need a plan. You do not need a free Saturday. You need one bag and five minutes. Pull the winter layer. Sweep the surface. Step back. Your outdoor season starts the moment you decide it does β€” not after the perfect weather window, not after a full yard renovation. Start today. Add to it next weekend. Your backyard will be ready before summer arrives. For more seasonal home hacks and five-minute resets, visit LifestyleVideos.com. Related Articles Home Hack: The Front Door Reset

Watch Now
Home Hack: The Outdoor Seating Reset in 5 Minutes

Home Hack: The Outdoor Seating Reset in 5 Minutes

Home Hack: The Outdoor Seating Reset This home hack turns your existing backyard furniture into an outdoor room β€” in five minutes. Watch our video above for step-by-step instructions. You have furniture outside. You do not sit in it. Most people with a patio or deck face the same situation. The chairs are out there. The table is there. But the space never gets used, and no one can explain why. The reason is placement. Furniture placed against a wall or aimed at the yard is storage, not seating. It signals nothing. It invites no one. The Outdoor Seating Reset changes that with two moves and one object. LifestyleVideos.com built this hack for GTA homeowners who want to get more out of the outdoor season β€” starting this weekend. Why Furniture Placement Determines Whether You Actually Sit Outside Outdoor furniture does not create an outdoor room. Arrangement does. When chairs face the same direction β€” both toward the yard, both parallel to the wall β€” there is no focal point. Your eye has nowhere to land. The space feels like a waiting area, not a place to stay. When two chairs face each other, the dynamic changes entirely. The space now has a purpose. It communicates conversation, rest, presence. Your brain reads it as a destination instead of a transit zone. This is not interior design theory. It is how human beings read space. Research published by environmental psychologists at the University of Surrey confirms that spatial arrangement directly influences how long people choose to stay in a space and how connected they feel to others within it. The same principle applies outdoors. In the GTA, outdoor season runs roughly five to six months. Every week your patio sits unused because the furniture feels wrong is a week of outdoor living lost. Two chair angles and one object on a tray. That is the difference. What the Reset Actually Changes This is not about buying new furniture. The reset works with what you already own. The transformation is positional, not material. When you angle chairs toward each other and place a surface between them β€” a small table, a stool, a tray on a crate β€” the area becomes a room. It has edges. It has a centre. It has a reason to be there. Add one object to the surface. A lantern. A candle. A plant. Something with height or light. That single object anchors the space visually and signals that someone thought about this. It reads as intention. And intention is what separates a space people want to be in from furniture people walk past. The Method: Two Moves, One Object You are not redesigning your patio. You are repositioning two chairs. Step 1: Pull the chairs away from the wall. Even thirty centimetres of separation changes how the space reads. Chairs pressed against a wall or railing are in storage mode. Pull them forward. Step 2: Angle them toward each other. Not parallel. Not facing the yard. Toward each other, at roughly a 45-degree angle. Leave enough space between them to place something in the middle β€” approximately 60 to 90 centimetres apart works for most patio chairs. Step 3: Place a surface between them. A side table is ideal. A stool works. A tray on top of a box works. You need a flat surface at roughly armrest height. Step 4: Add one object. A lantern, a pillar candle, a small potted plant, or a tray with both. One item is enough. More than three items tips into clutter. Step 5: Sit down. Look at what you built. Same furniture. Same patio. Completely different space. For more outdoor living resets and seasonal hacks, LifestyleVideos.com has a full library organized by room, season, and time investment. People Also Ask Why do I never use my backyard furniture even though it’s set up? Placement is the most common reason. Furniture aimed at a wall or the open yard creates no focal point and no invitation to sit. Angling two chairs toward each other with a surface between them changes the read of the space immediately. What do I put between outdoor chairs to make a seating area? A small side table is the standard choice, but a stool, an upturned crate with a tray, or a flat-topped planter all work. You need a surface at armrest height and enough stability to hold one or two objects. How do I make a small patio feel like an outdoor room? Create a defined centre. Two chairs angled toward each other, a surface between them, and one vertical object β€” a lantern or plant β€” gives the space edges and a focal point. Definition is what makes a small area feel like a room rather than leftover space. Two Chairs Are All It Takes You do not need a bigger patio. You do not need new furniture, string lights, or a weekend project. Pull two chairs away from the wall. Angle them toward each other. Put something between them. Add one object. Sit down. That is an outdoor room. You built it in five minutes, and it was there all along β€” waiting for the right arrangement. Your outdoor season is already running. Start using it. For more five-minute home hacks and outdoor living ideas, visit LifestyleVideos.com. Related Articles Home Hack: The Front Door Reset

Watch Now
Home Hack: The Closet Space Illusion in 5 Minutes

Home Hack: The Closet Space Illusion in 5 Minutes

Home Hack: The Closet Space Illusion This home hack makes your closet feel bigger without moving a single wall. Watch our video above for step-by-step instructions. Your closet does not feel small because it is small. It feels small because it is packed. The Closet Space Illusion is one of the fastest resets you can do in your home. No bins. No label makers. No donation run required before you start. Five minutes, and the space reads completely differently. At LifestyleVideos.com, we focus on changes that deliver visible results without a full weekend of work. This one qualifies. Why Your Closet Feels Smaller Than It Is Closets do not shrink. The perception of them does. When hangers press together, your eye reads the whole rod as one dense mass. There is no visual separation, no breathing room, no sense of order. The brain processes that as overflow β€” even when the closet is nowhere near capacity. This is not about storage science. It is about how the eye moves through a space. When you create gaps between items, your brain stops reading the closet as a problem and starts reading it as a system. The same number of items feels manageable. The space feels larger. Your morning routine gets faster because you can see what you have. According to research published by Princeton Neuroscience Institute, visual clutter actively competes for your attention and elevates stress. A closet you dread opening every morning is not a neutral experience. It starts your day with friction. The fix costs nothing. It takes five minutes. The Method: Three Steps You are not reorganizing your closet today. You are creating the illusion of space β€” and that illusion becomes real the moment you walk away. Step 1: Pull a few items off the rod. You do not need to decide what to keep or donate right now. Pull out five to ten items β€” anything you have not worn in the past month, anything that feels like a maybe. Lay them on the bed. You will deal with them later. For now, you are creating room on the rod. Step 2: Space your hangers evenly. Slide the remaining items apart so there is visible space between each one. Your hangers should not touch. Every item should have clear space on both sides. This single step changes how the entire closet reads. Step 3: Group by category or colour. This is optional but worth doing. Shirts together, pants together, jackets together. Within each group, move from light to dark. This gives your eye a path to follow instead of a wall to process. Stand back. Look at the rod. The closet did not change. Your experience of it did. For more fast resets that change how your home feels, LifestyleVideos.com has a full library of five-minute hacks organized by room and priority. People Also Ask Does spacing hangers actually make a closet feel bigger? Yes. Even spacing creates visual rhythm. Your eye reads gaps as order, and order reads as space. The rod looks less dense, the closet looks less packed, and the room feels calmer β€” even with the same number of items hanging. How many items should I remove to make the hack work? Start with five to ten items. You do not need to clear out the closet. You need enough breathing room between hangers that no two items are touching. That threshold is different for every closet, but five items is usually enough to see the shift. What is the fastest way to make a small bedroom closet look organized? Space your hangers, group by category, and remove anything visibly worn or out of season. These three steps take under ten minutes and change how the closet reads without buying a single organizer. Start Today, Not This Weekend You do not need a free Saturday. You do not need new storage solutions or a label system. Pull five items off the rod. Space the rest. Step back. That is the Closet Space Illusion β€” and it works every time. If you want to keep going, apply the same logic to your shelves. Remove a few items. Create gaps. Let the eye rest somewhere. Your home feels larger when it has room to breathe. For more five-minute home hacks you can act on today, visit LifestyleVideos.com. Related Articles Home Hack: The Front Door Reset

Watch Now
Home Hack: The 5-Minute Fresh Towel Reset

Home Hack: The 5-Minute Fresh Towel Reset

Home Hack: The Fresh Towel Reset That Changes Everything This home hack costs nothing and takes five minutes. Watch our video above for step-by-step instructions. Your bathroom does not need a renovation. It does not need new tile or a deep clean. It needs a towel reset. The Fresh Towel Reset is one of the fastest, lowest-effort changes you can make to a bathroom. The result looks immediate. The space feels cleaner, lighter, and more put together β€” without touching a single surface. At LifestyleVideos.com, we test these small changes so you know which ones are worth your time. This one is. Why the Fresh Towel Reset Works Most bathrooms feel tired, not dirty. Worn towels absorb light instead of reflecting it. Darker colours make a room feel heavy. Rumpled hanging creates visual noise your brain reads as mess. None of that is clutter. All of it reads as clutter. The Fresh Towel Reset removes that visual noise in one move. Here is what changes when you swap in clean, light-coloured towels and hang them with intention: The room feels brighter without a single light fixture changed The space reads as clean even before you scrub anything Guests notice it immediately You notice it every morning The psychology behind this is straightforward. According to research from the Princeton Neuroscience Institute, visual clutter competes for your brain’s attention and increases cortisol levels. A tidy, neutral visual field reduces that stress response. A towel is not a small thing. It is one of the largest single objects in your bathroom. The Method: Three Steps, Five Minutes You do not need a special folding technique. You need the right towels in the right position. Step 1: Pull the old towels. Remove anything dark, worn, or mismatched. If a towel has faded, frayed edges, or a colour that reads as heavy β€” pull it. Put it in the laundry or reserve it for gym use. Step 2: Choose light. White, cream, soft grey, or pale linen. These colours reflect light. They read as fresh. One set of matching towels β€” hand towel and bath towel β€” is enough to change the room. Step 3: Hang with intention. Fold your towel in thirds lengthwise. Then fold it in half. Hang it flat over the bar with the folded edge facing out. For hand towels, a simple tri-fold with a clean edge facing forward works. That is it. Five minutes. Done. If you want to go further, LifestyleVideos.com covers a full front door reset in our related article below β€” the same principle, applied to your home’s first impression. People Also Ask How often should I swap out bathroom towels? Every three to four days for daily-use towels. For a visual reset, swap them any time the bathroom feels heavy or cluttered. Do towel colour and texture really affect how clean a bathroom looks? Yes. Light colours reflect more light, which makes surfaces appear brighter. Texture matters too β€” flat-weave and waffle-weave towels look neater on a bar than thick, fluffy terry cloth that bunches. What is the easiest home hack for a bathroom that feels outdated? Start with towels. A matched set in white or cream costs under $30 and delivers an immediate visual upgrade without any renovation work. Start With What You Have You do not need to buy anything to try this home hack today. Look at your current towels. If they are light-coloured and in good shape, fold and rehang them with intention. That alone changes the room. If they are dark or worn, swap them out on your next run to the store. No tools. No budget. No rearranging furniture. This home hack works because it respects what you already have and removes what is working against you. For more five-minute resets you can do today, visit LifestyleVideos.com and browse the lifestyle section. Related Articles Home Hack: The Front Door Reset

Watch Now
5-Minute Home Hack: Front Door Reset

5-Minute Home Hack: Front Door Reset

Home Hack Overview This Home Hack improves your home’s first impression in five minutes. The Home Hack focuses on the front door, the most visible feature of the exterior. Across the GTA, winter leaves salt residue, dust, and moisture marks on entryways. By early spring, front doors often appear worn or neglected. A quick reset restores cleanliness and adds a welcoming detail. Watch our video above for step-by-step instructions and complete the Front Door Reset today. Guests and buyers form opinions within seconds. The entry sets the tone before anyone steps inside. Why It Matters First impressions influence how people evaluate homes. The entry area signals how the rest of the property receives care. Real estate professionals refer to this as curb appeal. Clean entryways increase perceived value and improve emotional response during property tours. Research from the National Association of Realtors shows exterior appearance ranks among the top factors shaping buyer perception. In colder climates such as Ontario, winter weather affects exterior surfaces. Snow, salt, and moisture collect around door frames and hardware. A small reset restores visual order quickly. Clean surfaces reflect light. A plant or wreath introduces balance and warmth. LifestyleVideos.com focuses on simple home improvements tied to everyday comfort and property presentation. The Front Door Reset Home Hack supports both goals. GTA Housing and Entry Design Homes across the Greater Toronto Area include a wide range of entry styles. Detached homes often feature covered porches or recessed doorways. These spaces collect winter debris and dust. Townhomes usually place doors closer to sidewalks or shared pathways. High foot traffic increases dirt accumulation. Condominiums rely on interior corridors, though unit doors still shape first impressions for guests and neighbors. Many homes across Toronto include darker painted doors. Dark colors highlight salt residue and fingerprints more easily. For sellers preparing homes for spring listings, real estate agents often recommend exterior touch-ups before photography and showings. Small entry improvements influence how buyers approach the rest of the property. How to Do the Front Door Reset This Home Hack takes five minutes. Follow these steps. Step 1: Wipe the Door Surface Use a damp cloth with mild soap. Wipe the entire door surface from top to bottom. Focus on areas near the handle and lower panels where dirt accumulates. Step 2: Clean the Door Handle Handles collect fingerprints and winter residue. Use a microfiber cloth or disinfecting wipe to clean the handle, lock area, and surrounding hardware. Polished metal reflects light and appears more inviting. Step 3: Shake or Clean the Door Mat Lift the entry mat and shake out dust and debris. If the mat appears worn or stained, replace it with a simple neutral design. Entry mats shape the first visual detail visitors notice. Step 4: Add One Decorative Element Place a small potted plant beside the door or hang a seasonal wreath. This single detail creates visual balance without clutter. Simple greenery works well across most entry styles. Step 5: Step Back and Check Alignment Stand several feet away from the entry. Confirm the door area appears clean and symmetrical. Straighten the mat and plant if needed. Watch our video above for step-by-step instructions showing this Home Hack applied to a real entryway. LifestyleVideos.com shares similar quick improvements designed for daily living and home presentation. Additional Entry Improvement Tips Outdoor lighting improves nighttime entry appeal. Replace burned bulbs and clean fixtures. Sweep the entry step or porch area once per week during spring. Keep packages, shoes, and storage items away from the doorway. Maintain door paint over time. Faded paint weakens curb appeal. These simple habits maintain the entry between deeper seasonal cleaning. People Also Ask Why does curb appeal matter for a home Exterior appearance shapes first impressions and influences how visitors or buyers evaluate a property. How often should you clean your front door Entry surfaces benefit from cleaning once every few weeks during winter and early spring. Do small entry improvements affect home value Clean and organized entryways strengthen buyer perception and improve property presentation. Thinking About It The front door marks the transition between outside and inside. When this space appears neglected, the rest of the home inherits the same impression. A quick reset restores order. Wipe the door. Clean the handle. Shake the mat. Add one plant or wreath. These small actions shift how people approach the home. Across the GTA, homeowners prepare properties for the active spring real estate season. The Front Door Reset Home Hack takes minutes yet improves the first detail every visitor sees. LifestyleVideos.com shares practical lifestyle strategies tied to home care and property presentation. Watch the video above and complete this five-minute entry reset today. Related Articles β€’ 5-Minute Curb Appeal Home Hack

Watch Now
5-Minute Home Hack: Spring Light Boost

5-Minute Home Hack: Spring Light Boost

Home Hack Overview This Home Hack shifts natural light across a room in five minutes. The Home Hack redirects daylight using mirror placement and curtain position. After winter, many homes across the GTA feel darker than expected. Sun angles change during spring, yet furniture placement and window coverings block incoming light. Watch our video above for step-by-step instructions and follow the five-minute Spring Light Boost challenge today. Small lighting adjustments change how a room feels. More daylight increases visual space and improves comfort. Why It Matters Natural light affects mood, focus, and daily energy. Homes with strong daylight exposure often feel larger and cleaner. Research from the Harvard Medical School links daylight exposure with improved sleep cycles and mental clarity. Additional research from the National Institute of Building Sciences notes strong daylight improves perceived indoor comfort. In real estate, natural light influences buyer perception. Bright rooms photograph better. They also feel more open during property tours. Spring marks the most active home buying season across the Greater Toronto Area. Buyers visit more homes during this period. Small presentation changes influence first impressions. LifestyleVideos.com focuses on simple improvements tied to home comfort and resale readiness. The Spring Light Boost Home Hack supports both goals. GTA Homes and Natural Light Homes across the GTA vary in light exposure. Condos in Toronto rely heavily on window orientation. North-facing units receive cooler daylight while south-facing units gain stronger sun exposure. Townhomes often include narrow layouts with windows located only at the front and rear. Light struggles to reach central rooms. Detached houses offer larger windows yet furniture placement still blocks daylight flow. Interior staging professionals across the GTA prioritize light reflection. Mirrors, glass surfaces, and lighter wall tones help daylight travel across rooms. This Home Hack applies the same principle using items already present inside most homes. How to Do the Spring Light Boost Hack This process takes five minutes. Follow these steps. Step 1: Locate the Primary Window Identify the window delivering the most daylight into the room. Midday sunlight works best. Stand across from the window and observe where light stops. Step 2: Reposition a Mirror Move a mirror so it faces the window instead of a wall. The mirror reflects daylight across the room. This simple change increases brightness and spreads light deeper into the space. Large mirrors work well, though smaller mirrors still produce results. Step 3: Adjust Curtains or Blinds Pull curtains slightly wider than the window frame. This exposes more glass and increases daylight entry. Raise blinds fully during daylight hours. Even small adjustments increase the amount of visible window space. Step 4: Clear Window Zones Remove objects blocking the light path. Plants, dΓ©cor pieces, and shelving near windows reduce daylight flow. Keep window areas open whenever possible. Step 5: Observe the Shift Step back and observe the room. Reflected light spreads across floors, furniture, and walls. Rooms often feel larger within minutes. Watch our video above for step-by-step instructions demonstrating this Home Hack in a real living room environment. LifestyleVideos.com shares similar quick strategies designed for everyday living and home presentation. Additional Light Optimization Tips Clean window glass twice per year. Dust and residue reduce light transmission. Choose lighter curtain fabrics during spring and summer months. Heavy fabrics absorb daylight. Use reflective surfaces such as glass tables or metallic trays near light paths. Place mirrors opposite windows inside narrow rooms or hallways. These simple adjustments improve daylight performance throughout the home. People Also Ask Does mirror placement increase natural light Mirrors reflect incoming daylight and distribute light across darker areas of a room. How do you brighten a dark living room Increase daylight exposure by repositioning mirrors, opening curtains, and clearing objects near windows. Does natural light affect home value Bright rooms create stronger visual impressions during showings and listing photography. Thinking About It Light shapes how every room feels. After winter, homes often carry darker layouts created during colder months. Furniture shifts, closed curtains, and blocked windows reduce daylight flow. The Spring Light Boost Home Hack resets the space quickly. Move one mirror. Adjust curtains. Clear the light path. These small changes improve daily living while strengthening home presentation during the spring real estate season. LifestyleVideos.com shares practical lifestyle strategies tied to home design, maintenance, and property value across the GTA. Watch the video above and try this five-minute Spring Light Boost today. Related Articles β€’ 5-Minute Curb Appeal Home Hack

Watch Now